
Your Ultimate Guide to Visa and Passport Photos Online.
All about Passport Photos Online. Everyone loves traveling, but one important thing you must do before you get your bags packed and hit the road is make sure you’ve got your traveling papers in order. If you’ve ever been on the verge of a big trip, only to find your passport is expiring in a couple of days, you know how hectic running around for passports and visas can be.
That is why, in this article, we’ll be looking at one crucial aspect of preparing a visa or passport for take-off. The photo of you, that is. We’ll be giving you all the important advice you might need when preparing your photo, as well as some sweet tips to get your passport or visa ready to go.
Ready? In 3, 2, 1…
The Photo for Passport
Having your photograph taken by a professional is super-expensive. When you’re getting ready to travel, it only stands to reason that you’d want to save up as much as possible. Why pay extra on a photo you can take yourself, when you could use that money to get yourself a coffee in Paris or Montreal, or wherever you’re going?
The truth about passport photos is that you can easily take them yourself, right at home, if only you stick to a few basic rules, which we’ll detail in just a bit.
Naturally, you will have to prepare both yourself and your photo space a little beforehand, so that your travel photo comes out just right. Remember, in most cases, your passport photo stays with you for as long as ten years. So it’s really not the time to pull a goofy grin or poke your tongue out.
Also, don’t be overly concerned with your appearance. We know, it’s an important photo, not just another selfie, so you want to look your best. And while it’s nice to add on some nice touches (like trimming your beard or adding a bit of make-up), don’t exaggerate.
Remember that the people who’ll be looking at this photo will mostly be sleepy airport officials who are probably thinking about what they’re going to eat later, not if you have elegant earrings.
Right, so now that we’ve covered the basics, let’s discuss some of the government-approved tips and tricks for getting the best passport or visa picture.
Visa & Passport Photos: What you need to know
Chances are you already have a professionally done picture in your house, either from an older passport, or one that belongs to a member of your family. Take a good look at that and note the person’s position, expression, clothing, etc.
Try to emulate the general feel of a “professional photo” in your own.
1. Now is not the time for dog ears.
It stands to reason, but still, it’s worth mentioning: when you’re taking a photograph for your passport or visa, you should leave all filters out, and take as clear a shot as possible.
Obviously, we know you won’t put on dog ears or sparkles or something bombastic, but you might still be tempted to swipe for a tint that makes your eyes pop, or a filter that hides that horrible zit on your chin.
Don’t.
If you have a zit or temporary imperfection, it’s okay to use powder or make-up to cover it up as best you can. Although you shouldn’t look like you’re ready for a night out, either, in your passport. Just a bit of discreet make-up will do.
And other than that, remember, the clearer the picture, the better.
2. Position yourself against a white background.
If it’s not white, any shade of off-white will do, but it’s important that the background is not colourful, as that takes away from your face.
Most people have a clean wall where they can take the picture. Naturally, if there are any photos hanging on the wall, or posters, or light fixtures, either move to a wall that is clear of such things, or take them off before shooting.
Travel officials know many people take these photos in their home, but that doesn’t mean they want to see a picture of your great aunt Gertrude.
3. Have someone else do it.
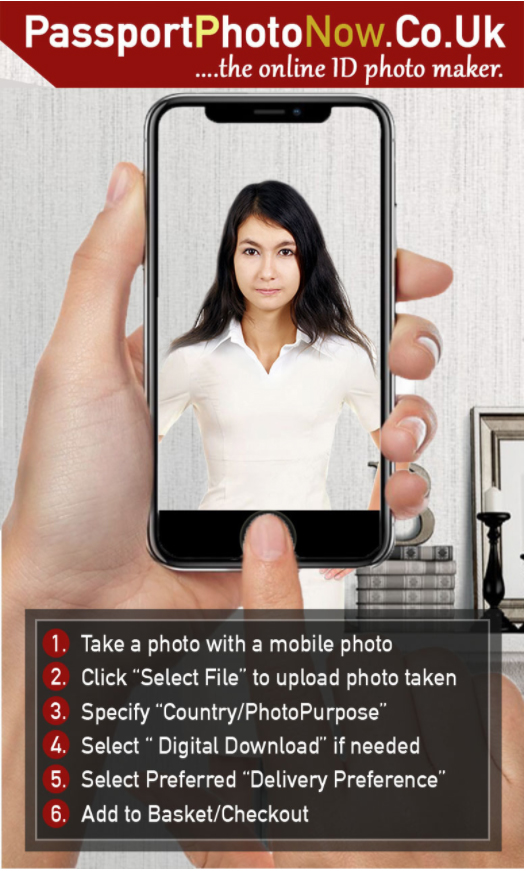
A travel photo is not a selfie. Since it’s impossible to get a picture of yourself from enough distance, and at a correct angle, have someone else take the photo for you.
Alternatively, you can take the photo inside a special photo booth (available in drugstores and other public places).
Make sure that the photo has a good, clear resolution and that they only get you from the shoulders up. Officials need to see your face, not the logo on your tee-shirt.
4. Take off any glasses or apparel.
Sunglasses prevent travel officials from seeing the most distinctive area of your face – your eyes. If they can’t see your eyes, they can’t identify you, so make sure you take off any glasses, as well as other apparel, that might make it difficult for a travel official to identify you.
5. Formal wear vs. informal wear.
A passport or visa photo is technically considered an official occasion, so anything overtly sexual or provocative is a clear no-no. Take into account the background colour and try to wear something that will stand out against it (so white or light colours are not a good idea).
A shirt is okay, as is a tee-shirt. A sleeveless shirt, however, is not considered decent.
Also try to wear a uniform colour. Stripes and dots are out, at least for passport photos.
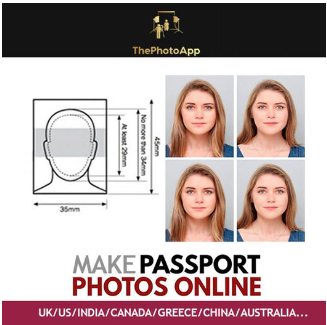
6. Be aware of the size.
You probably know that a passport photo needs to be small, but do you know exactly how small we’re talking here? How many inches? These details are important, particularly because different countries have different requirements.
So before you start taking pictures, make sure you read up on the specific requirements of the country you live in.
For example, the standard size for a U.S. passport photo (as well as for a visa photo) is 2 x 2 inches (51 x 51 mm). More than half of that needs to be taken up by your head. According to the U.S. Travel State Gov website, the head should take up an approximate 1 -1 3/8 inches (25 – 35 mm).
So that’s about the head (from chin to top, make sure not to crop your hair at the top!) and the neck. Maybe the shoulders, too, but no more.
Canadian passport photos, on the other hand, need to be 50 mm wide X 70 mm high (2 inches wide X 2- 3/4 inches long), with the head size being approximately 31 mm (1- 1/4 inches) and 36 mm (1- 7/16 inches).
For the United Kingdom, according to gov.uk website, passport photos need to be 35 mm X 45 mm (1 3/8″ X 1 ¾”) overall, with the head taking up between 31 and 36 mm (like for passports).
These differences aren’t big. 20 mm is a tiny difference, but one that is important to travel officials. This is why it’s important that you research the requirements of the country before you submit your application.
Luckily, most computers have specific passport size photos printer settings, so it should be easy getting your picture out, once it’s ready.
7. Keep your expression in check.
Maybe you’re feeling on top of the world, and would like to smile for all the world to see. Or maybe you’re feeling down and out, and would rather slouch and grimace.
Unfortunately, you must leave your personal feelings aside when taking a photo for your passport or visa, as most travel officials insist that you have a neutral expression in your travel picture.
That means no smiling, but no frowning, either. Keep your eyes open, and focused on the camera, as if you were looking into someone else’s eyes. Your mouth needs to be closed.
Also, remember that your face needs to be looking square at the camera. If your chin is slightly tilted, or your head cocked to the side, then you will need to retake your photo.
Speaking of retaking your photo…
Tip: Your photographer (whether professional or an acquaintance) will have to certify on the back of one photo that you are who you say you are. This is only necessary for first-time applicants, not for renewing your passport or visa.
Learn how to use passport photo booth