I like to get outdoors and revel in my deck. It can also be enjoyable to spruce your out of doors residing house up a bit with completely different do it your self initiatives. That is why I got here up with this enjoyable DIY hanging votive holders DIY venture. They will be made with tin cans out of your recycling bin and they’re going to look cute sufficient to make use of for adornment, entertaining visitors, or simply having fun with a night below the celebrities. You can be enchanted with how a can lantern lets the sunshine shine by in enjoyable patterns.
Illuminate Your Night with Upcycled Tin Can Lanterns
Looking so as to add a contact of allure to your out of doors house? Imagine the tender flicker of candlelight dancing in opposition to the backdrop of a starry evening sky. With just a few easy supplies and a splash of creativity, you may remodel extraordinary tin cans into enchanting lanterns that may illuminate your evening with model. In this DIY information, you’ll discover ways to upcycle tin cans into distinctive lanterns that may convey heat and eco-friendly class to your property or backyard. So, roll up your sleeves and prepare to shine a light-weight in your creativity!
Gather Craft Materials
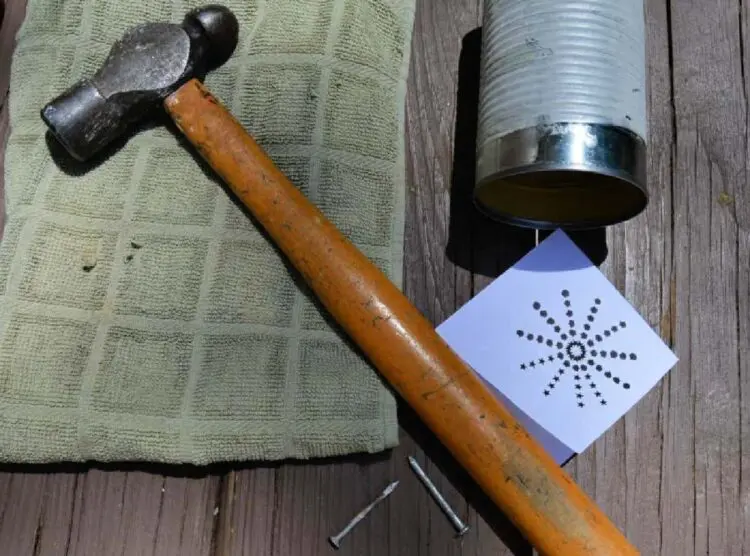
Before you start creating your upcycled tin can lanterns, collect your supplies. You will want quite a lot of tin cans in several sizes, a hammer and nail or drill, paint or spray paint in your alternative of colours, tea lights or LED candles, and any further ornamental components comparable to stencils. Having all the things you want readily available will make the method smoother as you put together to rework your tin cans into lovely lanterns.
Craft Supplies Needed For Tin Can Lanterns:
- number of sizes of tin cans out of your recycling bin (cleaned out)
- hammer
- nail (you might have considered trying just a few completely different sizes to attain completely different measurement dots)
- wire (14 inch strips are nice)
- pliers
- small votive candles, tea mild candles, or flameless LED votives (right here is an affiliate hyperlink to my favorites on Amazon)
- paint (see affiliate link for what I used or get detailed solutions under)
For a tin can out of doors DIY venture, you’ll need to use a sturdy, weather-resistant paint. Here are some nice choices:
- Spray Paint: Look for spray paints designed for steel surfaces, like Rust-Oleum or Krylon. These are made to resist out of doors circumstances, and so they present even protection, particularly for spherical surfaces like cans.
- Acrylic Paint: This is flexible and works nicely for tin cans if you happen to apply a primer first. It’s additionally straightforward to seek out and is available in quite a lot of colours. However, it’s finest to seal it with a transparent acrylic sealer to make it weatherproof.
- Enamel Paint: This is a robust, sturdy choice that may resist fading and chipping open air. It’s usually used for steel initiatives and holds up nicely to the weather.
How To Make Tin Can Lanterns:
Ok, now on to make a lantern from a tin can with step-by-step instructions and pictures.
Prepare Your Tin Cans
To put together your tin cans for transformation into lovely lanterns, begin by cleansing them completely inside and outside. Remove any labels or adhesive residue by soaking the cans in sizzling, soapy water and scrubbing them clear. For security, ensure there aren’t any sharp edges. If you discover tough edges or jagged cans, choose a unique can or use a high quality grit sandpaper to rigorously easy it. For added safety, you may apply a bead of sizzling glue or silicone sealant across the sharp edges. This softens the rim and creates a easy floor. Then dry the can exteriors completely.
Next, fill cans about 3/4 full with water and freeze. The frozen water will permit the tin can to carry its form with out denting the can itself whilst you hammer the nails by.
Tin Can Lantern Patterns
While the can of water is freezing, you may choose a sample for the holes. This will permit mild to shine by when the lanterns are lit. You can spell a phrase with a letter on every can (like JOY), go along with a easy design like a star or coronary heart, use geometric patterns, or you may determine to do an summary free hand sample like a sunburst.
If you determine on a letter or a sample you’ll most likely need to draw that out on paper so it will probably function your stencil if you end up prepared to begin hammering. Or you will discover free printable stencils. While the free hand sample is a bit much less work beforehand, you do want some creativity to associate with it.
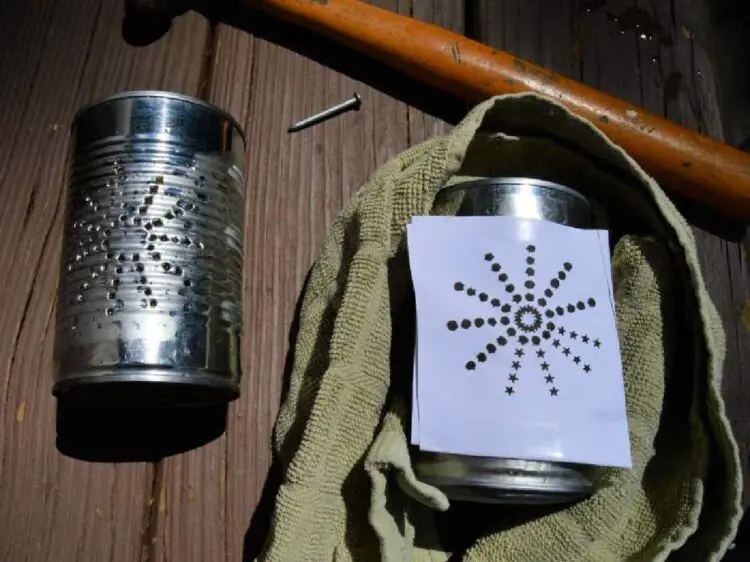
Remove a can when the water is frozen by.You can now tape a stencil to the can. Masking tape works nicely for this. Wrap the can in a dish towel to assist maintain it in place and hold your fingers from getting too chilly. Begin hammering simply sufficient to punch by the tin and hold transferring alongside making your punch holes at even intervals to create the sample.
When you will have created a sample you want, you may add a nail gap to the highest of every aspect of the tin can as a way to make them into hanging votive holders.
After letting your ice soften, you may dump out any remaining water and dry the can out.
Add Final DIY Lantern Design Elements
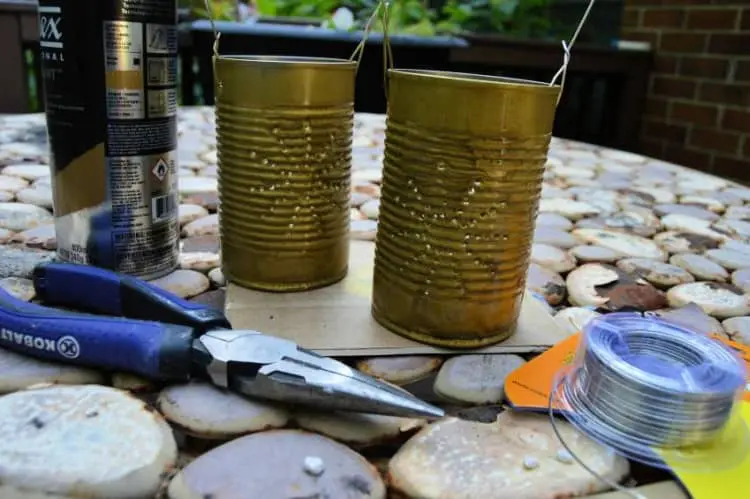
Now, you may transfer on to the subsequent step of designing your lanterns with paint and different gildings. If you select to color your votive holders, now’s the time. You can depart them the shiny silver they’re naturally or give them a coat of paint. You might think about using colourful paints (like turquoise) so as to add vibrant hues to your cans. I selected a fast spray paint coat of basic gold over some outdated newspapers to guard my surfaces. Then, permit your lovely lantern to dry.
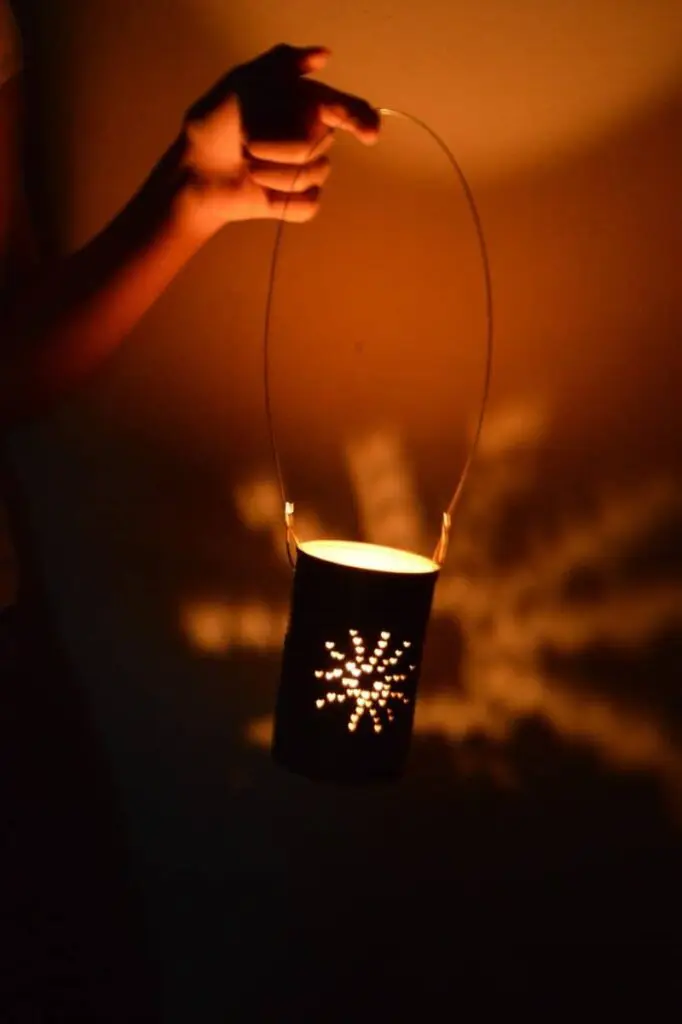
You can set your lanterns round on areas or you may add a wire deal with to hold them with. Cut your wire right into a 14 inch piece after which stick every finish of the wire into your hanging holes and twist wire onto itself to safe in place. Now, you will have a dangling lantern.
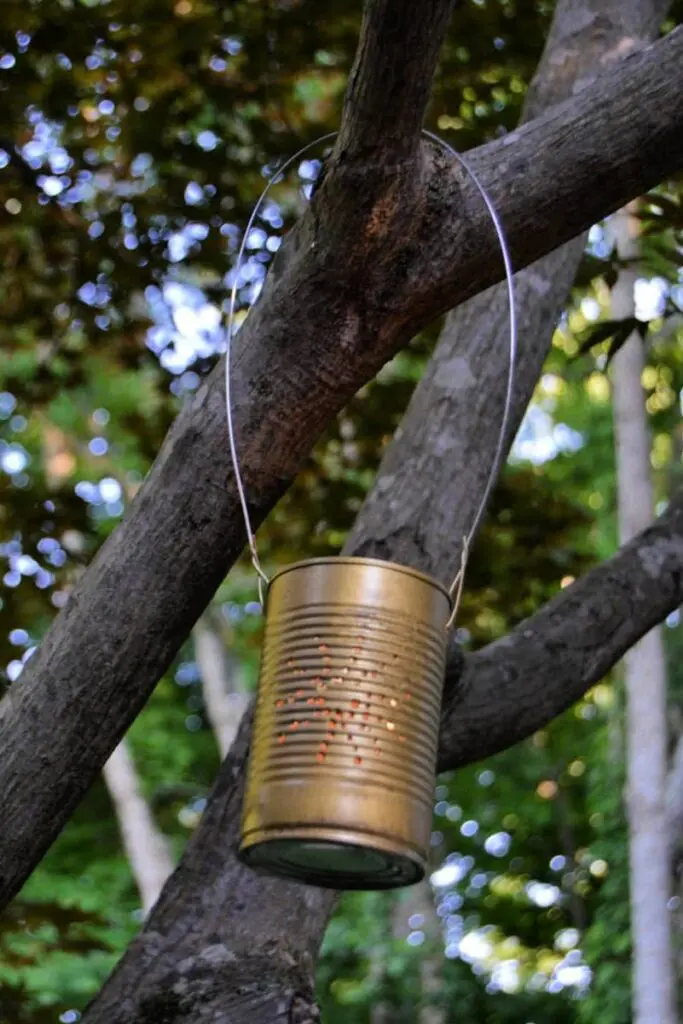
These DIY hanging votive holders look nice on a shepherd’s hook or perhaps a tree limb! Or depart off the hanging wire and set the DIY tin can lanterns in your out of doors tables for some added mild and ornament. Just add battery tea lights and benefit from the glow by the pierced lantern.
Conclusion
Turning empty cans into tin lanterns is a rewarding expertise. By infusing your character into your upcycled lanterns, you may create a novel and particular ambiance in your house that displays your model and creativity. Placing them strategically round your property or out of doors space can create a heat and welcoming environment, excellent for cozy nights or festive gatherings. The light glow of the candlelight (or LED lights) shining by the intricate patterns in your tin can lanterns will forged mesmerizing shadows and add a contact of magic to any house.
In only a few easy steps, you may remodel outdated tin cans into gorgeous lanterns that won’t solely illuminate your house but in addition convey a contact of creativity and sustainability to your property or backyard. Do you assume you’ll do that enjoyable diy venture to spruce up your out of doors house?
Related Posts:
Tin Can Planters: Eco-Friendly Kids Craft Project
How to Make A Vase Out Of A Tin Can

